Add a background image to your HubSpot email template
Designing email templates is similar to web design in the 90s: a bit of a nightmare! Unfortunately each email client varies widely in what it will and will not support. However, once you've spent enough time around email templates, you begin to figure out the tricks.
Over the years a common request I get from HubSpot clients is to create an email template with a background image.
In theory, background images are not supported on many email clients (I'd recommend referencing this page for email CSS support when designing your template.) However, I have found a useful workaround for doing so which has passed the litmus tests. Check it out!

Read on for details on how to add a background image to your HubSpot email template.
Bulletproof Background Images
The code I use is based off of Campaign Monitor's Bulletproof Background Images which I've found to be pretty bulletproof indeed (although I have done some tweaking for Outlook).
1/ Create a Custom Module
To use this in HubSpot, we're going to create a custom module for email templates.
- Go to Marketing > Files and Templates > Design Tools
- Click on the folder you would like to add your module to on the right
- Click on File > New File
- Choose "Module" under "Components"
- Select "Email Templates" under "Where would you like to use this module?"
- Name your module and click on "Create"
2/ Add in Your Editable Fields
Because we want to be able to update the content each time we use the module in an email, we're going to add fields to update the background image and content. You can do this from the "Add field" option on the right hand side:
- Add an Image field and name it "Background Image"
- Add a Rich Text field and name it "Content"
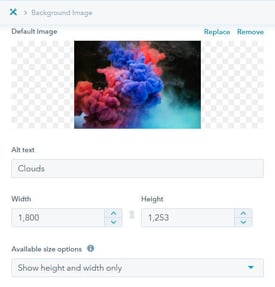
Your sidebar should look like this:
.png?width=275&name=Email%20background%20image%20module%20fields%20(1).png)
3/ Paste in the Code
The code below includes a logo on the upper left hand corner, three social icons and space for header content.
See the Pen Untitled by Stephanie O'Gay Garcia (@stephanieogaygarcia) on CodePen.
Copy and paste it into the code section of your custom module.
If you click on "Preview", it's not going to look like much, but we'll move into making it look amazing now :)
4/ Customise the module
There are several parts of the module that we can customise now to make it look nice.
a. Default Background Image
Let's add a default background image to the "Background Image" field by hovering over the "Background Image" field on the right and clicking on "Edit". Under "Default Image" you should have the option to select an image.

Users will later be able to update this image on each individual module.
b. Default Content
Similarly, hover over the "Content" field on the right hand side (if you're still in the Background Image section, you can click on the tools icon on the top breadcrumb menu to go back), click on "Edit".
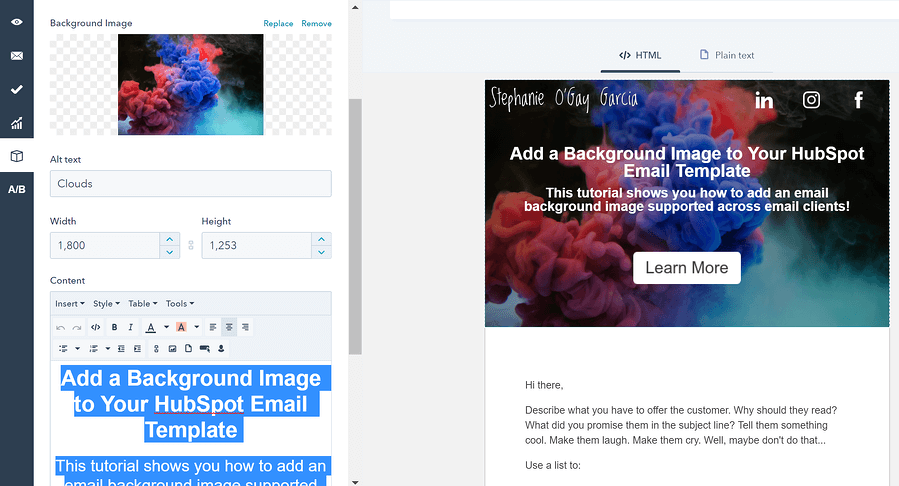
Click on the Default Rich Text field and enter some content. It will look best if you set the text to white (after writing it) and center-align it (I've highlighted it below so you can see the white text).
.png?width=1493&name=defaultemailrichtext%20(1).png)
c. Logo and Social Icons
In this part of the code (lines 27 to 34 on the code you pasted into your module), you can update your logo and social icons:
 <!-- Logo -->
 <th class="logo-column" align="left"><a href="#"><img style="text-align: left; width: 120px; max-width: 2000px;" src="#"></a></th>
 <!-- Social Icon 1 -->
 <th class="sm-icon-column"><a href="#"><img style="margin: 0 5px; max-width: 25px; max-height: 25px;" src="#"></a></th>
 <!-- Social Icon 2 -->
 <th class="sm-icon-column"><a href="#"><img style="margin: 0 5px; max-width: 25px; max-height: 25px;" src="#"></a></th>
 <!-- Social Icon 3 -->
 <th class="sm-icon-column"><a href="#"><img style="margin: 0 5px; max-width: 25px; max-height: 25px;" src="#"></a></th>
I've highlighted the sections above you will want to update. The "#" in the "href" should be replaced with the link for the page you would like to link to and the "#" in the "src" should be replaced with the link to the icon you would like to use in each case (you can upload your icons to the File Manager and get the link from there).
For example, when I add in my own logo and social icons, this snippet of code looks like this:
 <!-- Logo -->
 <th class="logo-column" align="left"><a href="http://www.stephanieogaygarcia.com/"><img style="text-align: left; width: 220px; max-width: 2000px;" src="https://www.stephanieogaygarcia.com/hubfs/Logos/stephanieogaygarcialogo_white.png"></a></th>
 <!-- Social Icon 1 -->
 <th class="sm-icon-column"><a href="https://www.linkedin.com/company/stephanieogaygarcia/"><img style="margin: 0 5px; max-width: 25px; max-height: 25px;" src="https://www.stephanieogaygarcia.com/hubfs/Blog/linkedin-logo.png"></a></th>
 <!-- Social Icon 2 -->
 <th class="sm-icon-column"><a href="https://www.instagram.com/stephanieogaygarcia/"><img style="margin: 0 5px; max-width: 25px; max-height: 25px;" src="https://www.stephanieogaygarcia.com/hubfs/Blog/instagram-logo.png"></a></th>
 <!-- Social Icon 3 -->
 <th class="sm-icon-column"><a href="https://www.facebook.com/stephanieogaygarcia/"><img style="margin: 0 5px; max-width: 25px; max-height: 25px;" src="https://www.stephanieogaygarcia.com/hubfs/Blog/facebook-logo.png"></a></th>
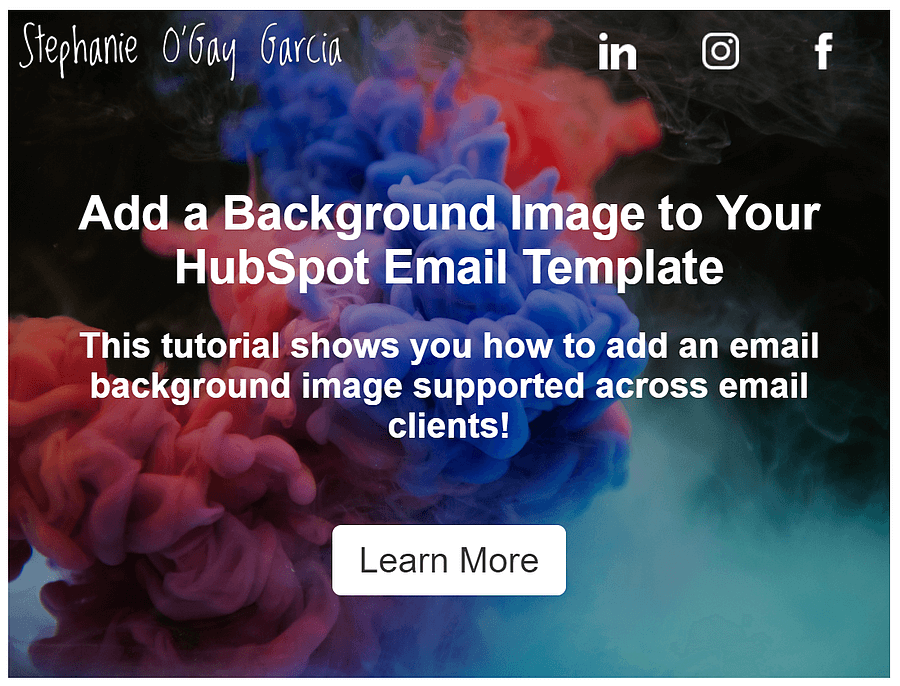
Now if you click on "Preview" you should see that your email background image module is starting to look a lot better:

d. Default Background Colour
If, for any reason at all, our background image doesn't load, we will want to make sure that the colour that appears in it's place is in line with our brand.
Currently I have this set to this shade of red ( #F73E4B ) but you can replace that with your own colour. You'll can find and replace this on the template by holding Ctrl + F, inserting #F73E4B into the search bar, clicking on the first icon to toggle "replace" and using the "Replace All" option.
d. Advanced Customisation
If you want to get further stuck into the code, you can update other aspects of the code (some basic HTML knowledge is needed).
- Update the email width: you can use the Find and Replace function above to replace "600" with another width, if that's what you use on your email template
- Update the module height: in order to display it correctly in Outlook, I was forced to add some fixed heights to the code (lines 19, 21, 26, 36-39) which can be adjusted accordingly.
- Update the logo width: I updated my logo width by changing the "width" on line 28 of the code.
- Increase padding: you can update the cellpadding around the content to add more padding to it
- Remove logo and social icons: if you just want a background image with content in front of it, you can delete the HTML between the <tr> tags from lines 26 to 35 (and any CSS in the style section for them)
- ...etc.
Using Your HubSpot Email Background Image Module
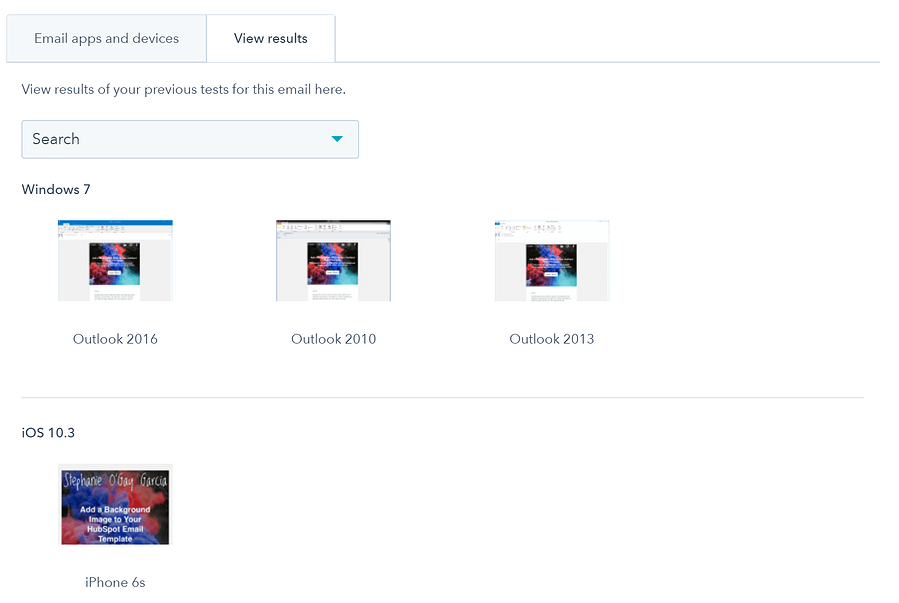
Now that you've built the module, you can drag it into any email template and use it. I have tested this across email clients and have found it to work.

However, if you do run into any issues, feel free to reach out!
If you found this helpful, buy me a coffee! ❤️
← Previous Article
Set featured posts on the HubSpot blog listings page