⚠️ Note that this post hasn't been updated for at least a year and the information may be outdated, proceed with caution! (Last updated: October 22, 2023)
When you enable the "Make this field required" setting on a HubSpot form field, it will show an asterisk (*) next to the field label:

You can remove or style this on your portal using CSS.
Remove the required field asterisk
You can remove the required field asterisk using the following CSS snippet:
.hs-form-required { display: none; }
Scroll down to learn where to add this code.
Style the required field asterisk
Alternatively, instead of removing the asterisk completely, you can also style the asterisk using CSS.
Changing the colour
You can update the colour of the asterisk above with the following CSS snippet:
.hs-form-required { color: #0171b2; }
where you can replace the above colour (#0171b2) with your own.
Scroll down to learn where to add this code.
Where to add your code
There are a few places you can add this code depending on your comfort level and which forms you'd like to hide the asterisk on.
Add the code to your theme's stylesheet
The best practice would be to update your website theme's stylesheet. You can find your theme by going to Marketing > Files & Templates > Design Tools and locating your theme in the sidebar.
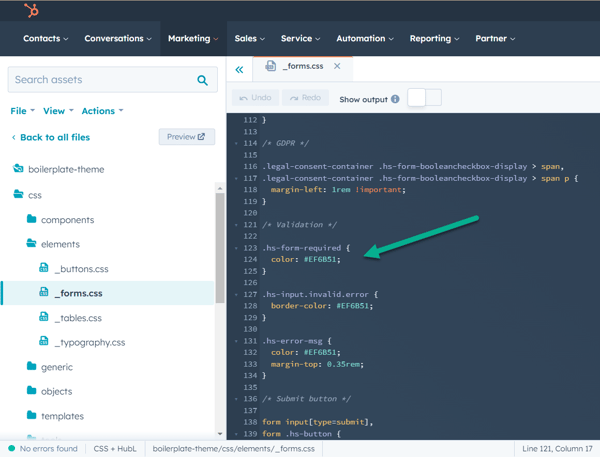
In most HubSpot themes that follow the CMS boilerplate structure, you can go into css > elements and open the _forms.css file which will already have a "Validation" section with the .hs-form-required CSS class:

However, themes vary a lot. Also, if you're using a Marketplace theme, you'll need to create a child theme to make any changes, so I wouldn't recommend updating this unless you're comfortable with CSS.
Note that updating the styling from your theme's stylesheet will affect all forms on your website.
Add the code to your template or page
You can style the form on a specific template or page in the "Additional <head> markup" section of your template or the "Head HTML" settings of your page (read HubSpot's help article here).
If you are doing this, you'll want to add the opening <style> tag before your CSS and the ending </style> tag after your CSS, like this:
<style>
  .hs-form-required { display: none; }
</style>